
GPT Image 2.5
for E-commerce:
15 Prompts & Examples
A practical guide to product listings, model try-on and images that show your product in use.
Turn a product photo into a clearer visual brief. Explore these examples, adapt the prompts to your catalog, and bring your next idea to GPT Image 2.5 AI.
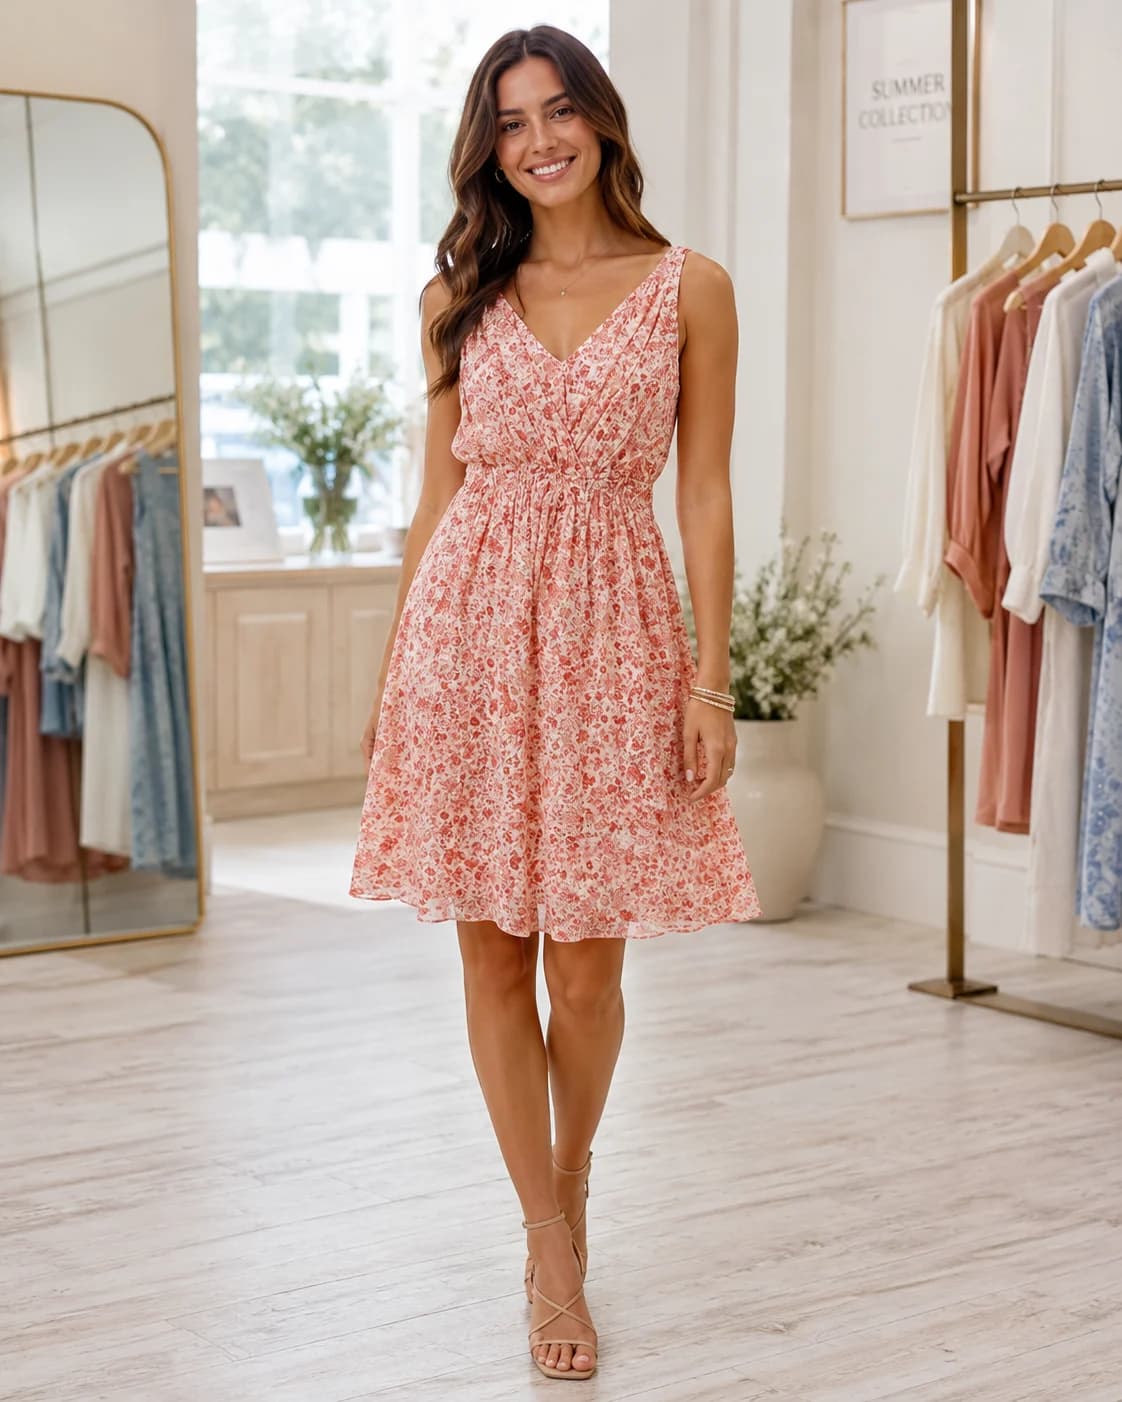 Fashion studio reference · See Case 13
Give every product image one clear job
A product gallery can answer several questions: What is the item? What does a detail look like? How is it worn or used? A useful AI e-commerce image prompt chooses one of those questions and specifies the visual evidence needed to answer it.
This guide organizes 15 examples into five workflows: listing images, model try-on, product showcases, human interaction and social commerce. Each case includes a reference image, a rewritten prompt and a review checklist. Start with one product and one image type, then expand the set after the first result holds up to inspection.
About the examples: The images are selected reference illustrations, not verified outputs from the rewritten prompts below. Text-bearing selections use English; other images are text-free or contain no promotional copy. Human scenes are prioritized where suitable versions exist. The copy was developed with AI assistance and visual review of the selected references.
| Workflow | Best for | Most important check |
|---|---|---|
| Listing images | Product information and English localization | Copy matches the actual item |
| Model try-on | Outfit, silhouette and accessory placement | Garment construction stays consistent |
| Product showcases | Angles, variants and backgrounds | Hidden details are not invented |
| Human interaction | Grip, use and context | Hands and contact points are plausible |
| Social commerce | Fashion series, gifts and fresh food | Presentation does not change the offer |
A reusable product-image prompt framework
Describe the task in terms of constraints, not just aesthetics. “Premium” can mean many different things; “one bottle, a side-lit stone surface, no added wording” gives the generator a more concrete brief.
Prepare a clear product photograph, close-ups of distinctive details and a list of factual claims you can support. For an existing product, an editing workflow with references is usually the more practical starting point than describing the item from memory. Use text-to-image for concepts that do not need to match a specific SKU.
- Open the image workspace.Go to GPT Image 2.5 Generator and choose the editing workflow when you are working from an existing product photo.
- Replace the placeholders.Fill in every field inside braces. Include only the product details, dimensions and wording you have verified.
- Request one usable image.Choose an aspect ratio for the intended placement. The ratios in this guide are composition suggestions, not marketplace rules.
- Review, then expand.Compare the result with the original, correct specific errors, and only then create alternate angles or scenes.
1. Product listing image prompts
Listing images should help a shopper identify the item, understand a feature, or picture it in use. Assign one job to each image before writing a prompt. A lifestyle image belongs in a supporting gallery when a marketplace requires a plain main image; an attractive scene does not automatically make a compliant listing cover.
Localize a product image for an English-speaking market
Turn an existing product reference into a readable English listing layout without changing what is being sold.
The reference shows a fashion doll in a lavender dress. That distinction matters: the headline and supporting copy must describe the doll, not imply that the dress is adult apparel. Carry the same discipline into every market adaptation. Translate the meaning and verify the product category before adjusting typography.
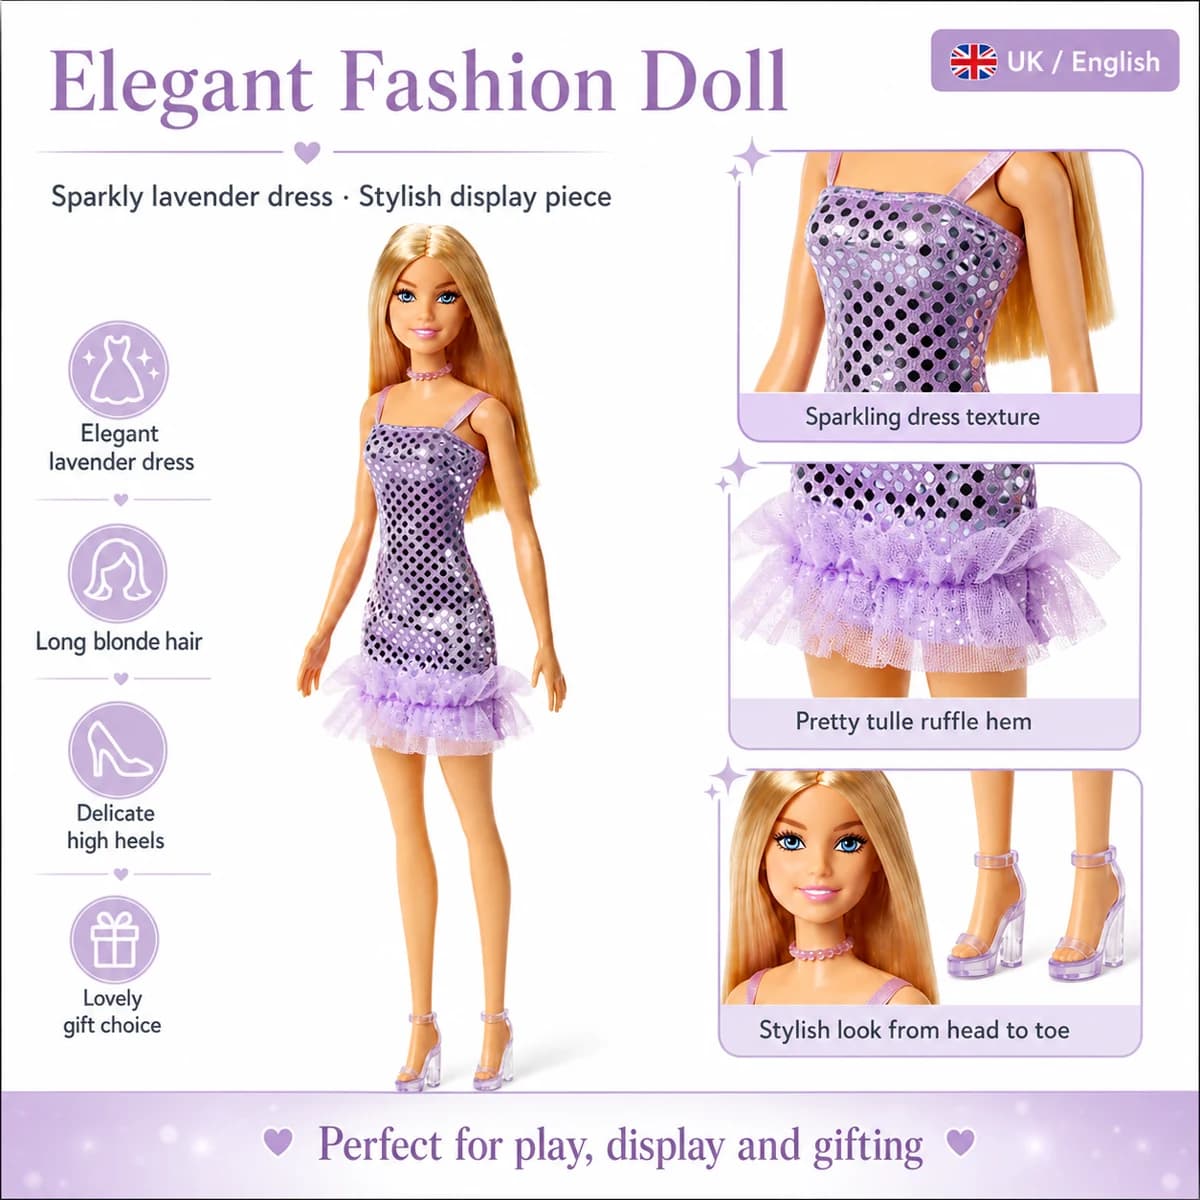
Use the uploaded product photo to create one English-language listing infographic for {target_market}. The item is {accurate_product_name}; keep its category, proportions, colors and visible details unchanged. Place a large product view beside two close-up panels showing {detail_1} and {detail_2}. Use this approved headline: "{headline}". Add only these verified feature captions: {approved_feature_copy}. Keep the text short, with clear spacing and strong contrast. Do not turn a toy into a real person, add accessories that are not included, or invent dimensions. Output one portrait image in a 3:4 ratio.What to customizeReplace the product name, market, headline and two detail captions. Keep the output language explicit even when the original reference uses another language.
What to checkRead every caption against the actual product. Check that close-up panels show the same item and that any accessories pictured are included or clearly presented as styling props.
Replace a product inside an established lifestyle layout
Reuse a useful composition when introducing a different product to the same visual setting.
The bedside-lamp example keeps a person in the scene, giving the product a believable use context. For a replacement task, provide both the new product reference and the scene you want to retain. The most demanding part is the contact area: a lamp needs to sit on the table naturally, and its light must interact plausibly with nearby surfaces.
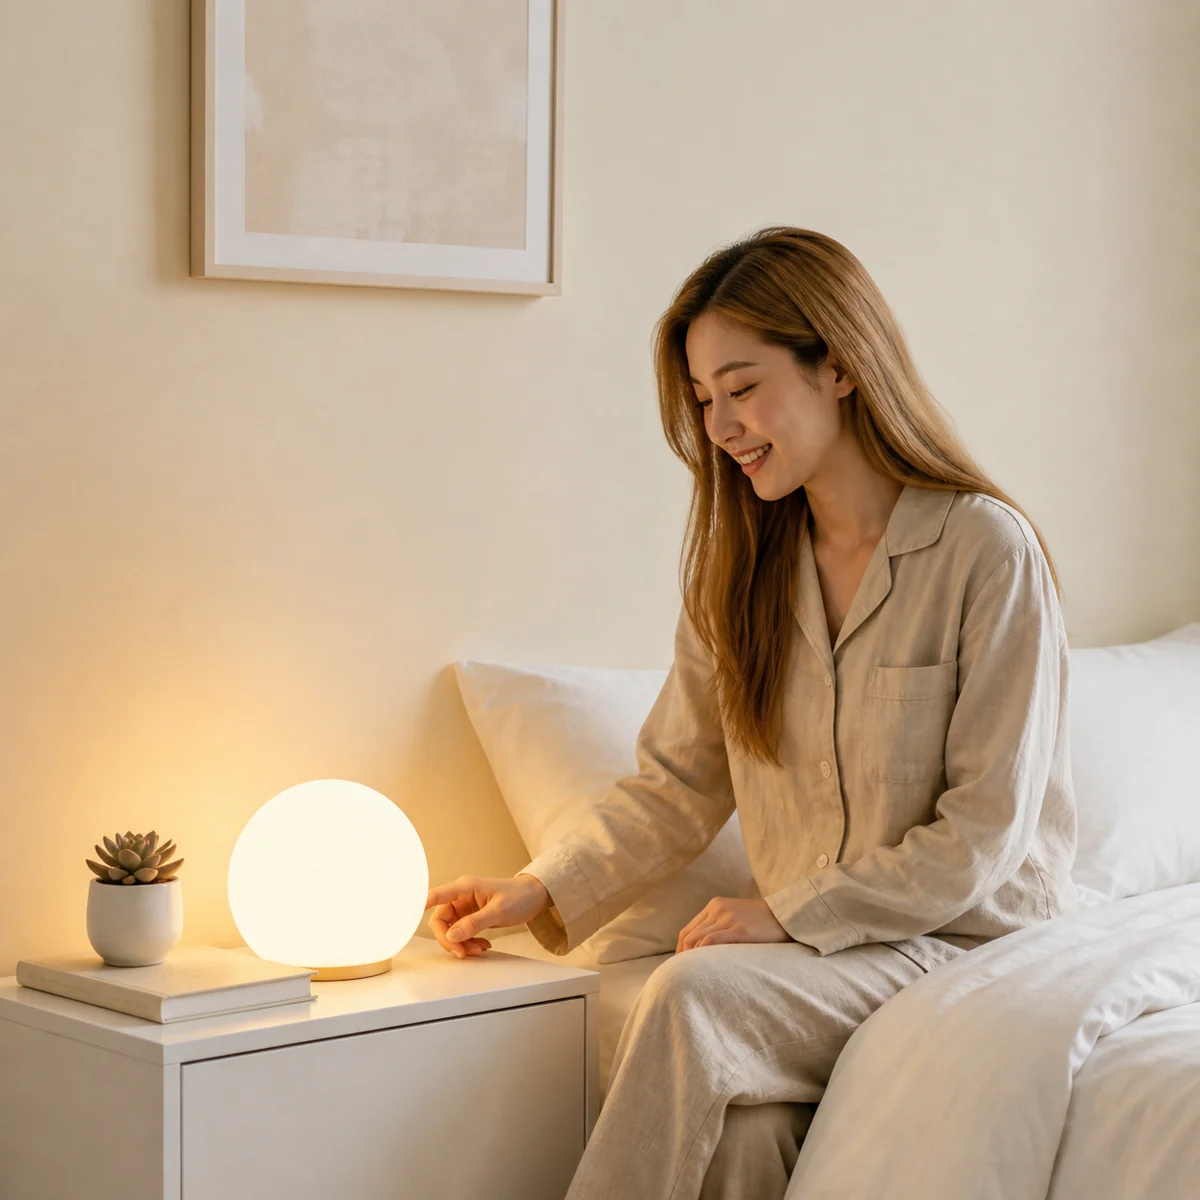
Image 1 shows the replacement {product_name}. Image 2 is the lifestyle composition to edit. Replace only the existing product in image 2 with the item from image 1. Preserve the person, pose, furniture, camera angle and room arrangement. Match the new product scale to the placement surface and maintain its shape, color and construction. Rebuild the contact shadow and any local reflections or emitted light needed for a believable result. Keep unrelated areas unchanged. Do not duplicate the product or cover the person. Add no text. Return one image in the original scene aspect ratio.What to customizeSpecify which object to replace if the scene contains several products. For a non-luminous item, remove the instruction about emitted light.
What to checkLook for remnants of the old item, floating bases and light that no longer matches the replacement. Do not describe an untested item as brighter or more powerful.
Translate listing graphics while preserving the layout
Adapt an existing product graphic into English while keeping its image hierarchy consistent.
Translation and redesign are separate jobs. When the layout already works, a constrained text replacement is easier to review than a full rebuild. Prepare a small source-to-English wording list first, especially for dimensions, capacity and material names. Shorter English phrasing can prevent text from spilling out of labels.
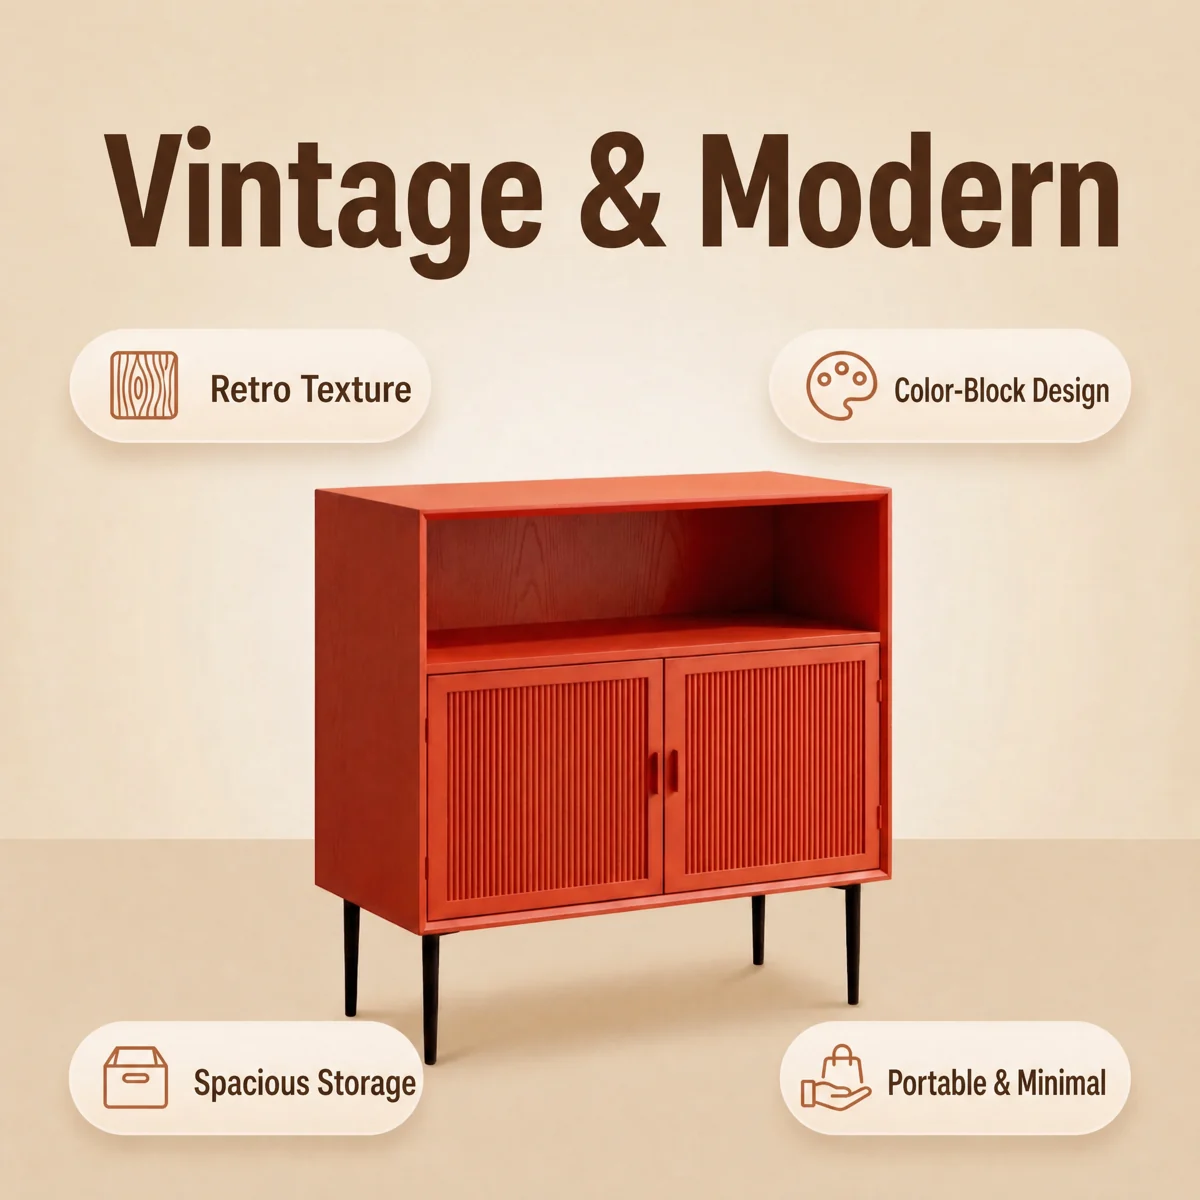
Translate the visible promotional text in the supplied listing image into English using this exact replacement list: {source_text_to_approved_english}. Preserve the cabinet, colors, shadows, background, icons and panel positions. Keep all verified numbers and units unchanged unless the replacement list explicitly provides a conversion. Fit the English copy into the existing text areas with readable spacing. Preserve the original hierarchy between the headline and feature labels. Do not add new benefits, symbols or decorative elements. Return one image with the same aspect ratio and no untranslated promotional text.What to customizeSupply every replacement phrase instead of asking for an open-ended rewrite. If a translated label is too long, shorten the wording before reducing the font.
What to checkCheck for leftover source-language text and compare every number with the original. A plausible sentence is not enough if it changes a material or capacity claim.
2. Model try-on and apparel prompts
Apparel images need to communicate silhouette, fit and styling while keeping the garment recognizable. Use a clear product reference and describe which aspects of the model or scene may change. Treat synthetic try-on as a styling illustration: it cannot establish a shopper’s exact size or how a fabric will fit their body.
Show a dress on a model in a lived-in setting
Help shoppers picture a garment as part of a complete outfit and a realistic occasion.
A seated pose reveals different things from a standing catalog image. It can show how a skirt falls across the lap, but it may hide the full hem or waist construction. Use this kind of scene as a companion to a clear front view, and keep the print scale and neckline tied to the supplied garment.
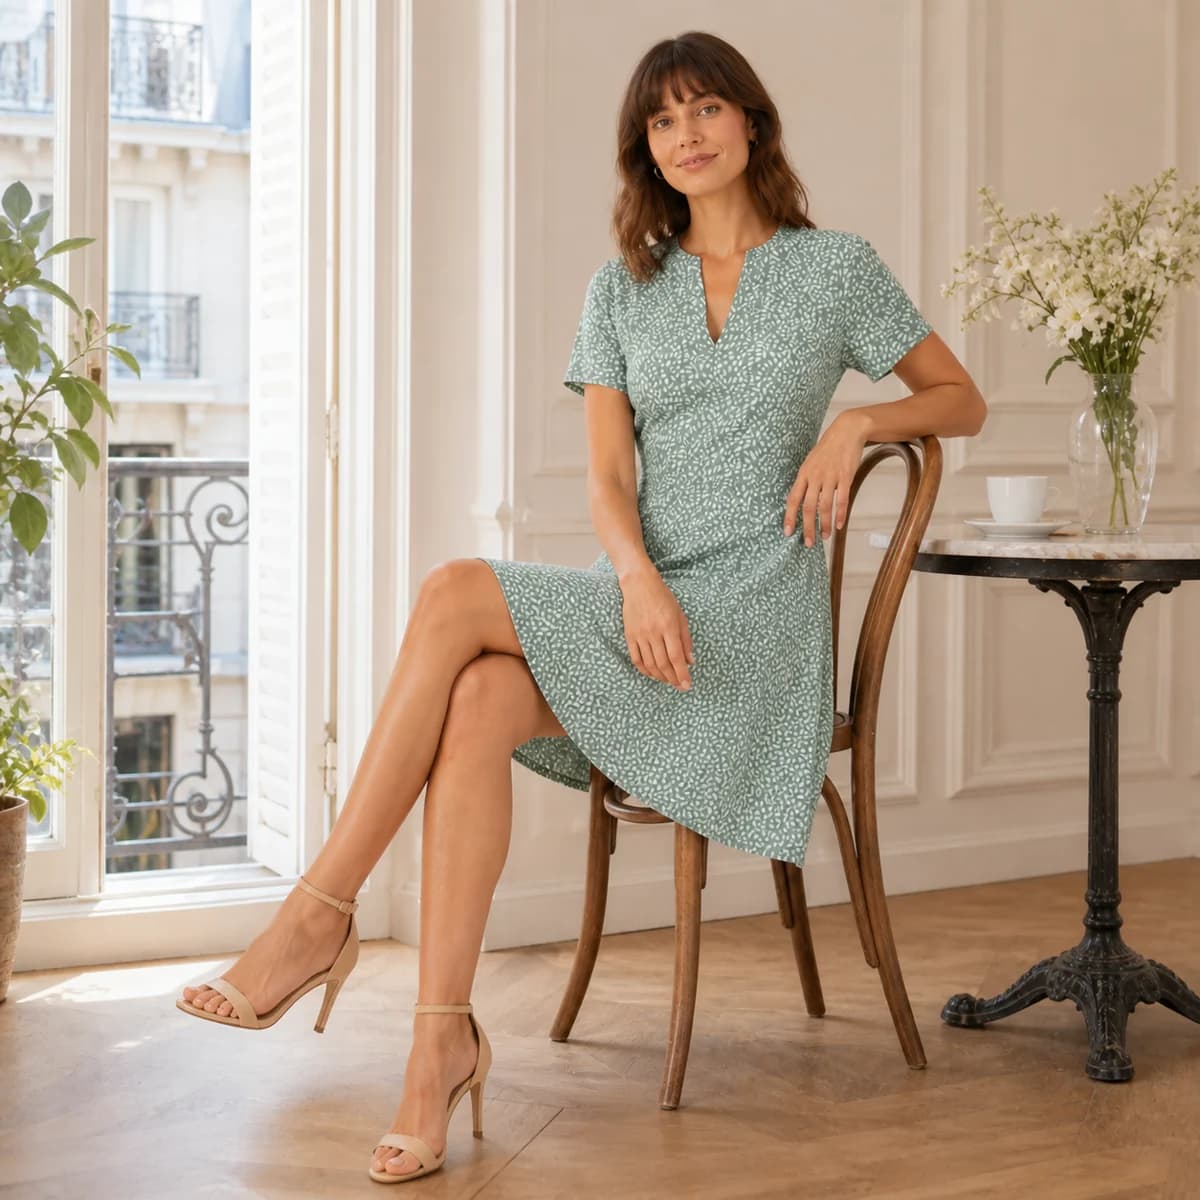
Create one realistic lifestyle image of an adult model wearing the {garment_description} from the uploaded reference. Preserve the neckline, sleeve length, hem length, pattern scale, color and seams. Place the model seated naturally beside a window in a bright, understated room. Keep the garment visible and show believable folds where the fabric meets the chair and knees. Use soft daylight and restrained styling with {approved_accessories}. Do not add slits, change the cut, or smooth away the fabric texture. No text or promotional graphics. Use a 3:4 portrait composition.What to customizeDescribe the actual garment construction and allowed accessories. For the first attempt, choose a simple pose with limited occlusion.
What to checkCompare the neckline, sleeve shape and print repeat with the product photo. Treat the result as styling guidance, not a measured fit demonstration.
Expand a model image into additional poses and framings
Build variety for an apparel gallery without changing the model or outfit between frames.
The selected references pair a full-length presentation with a tighter view. Request one variation at a time so identity and garment details are easier to compare. A repeatable shot list is more useful than a vague request for “more poses”: define the crop, body angle and hand position for each image.
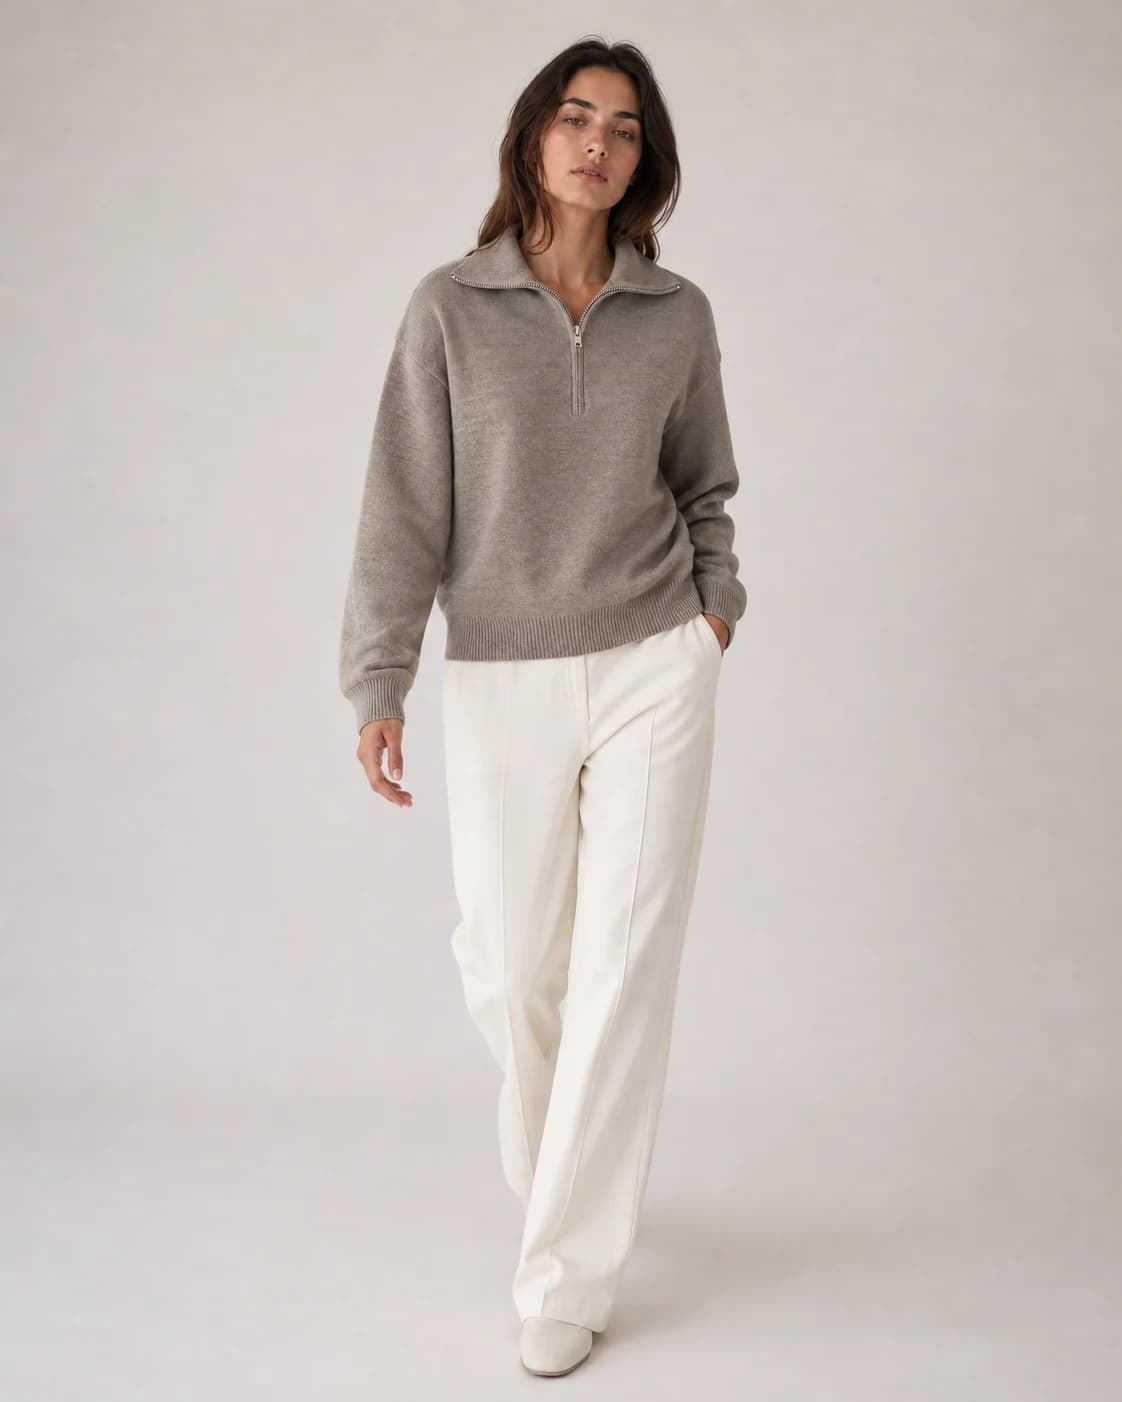
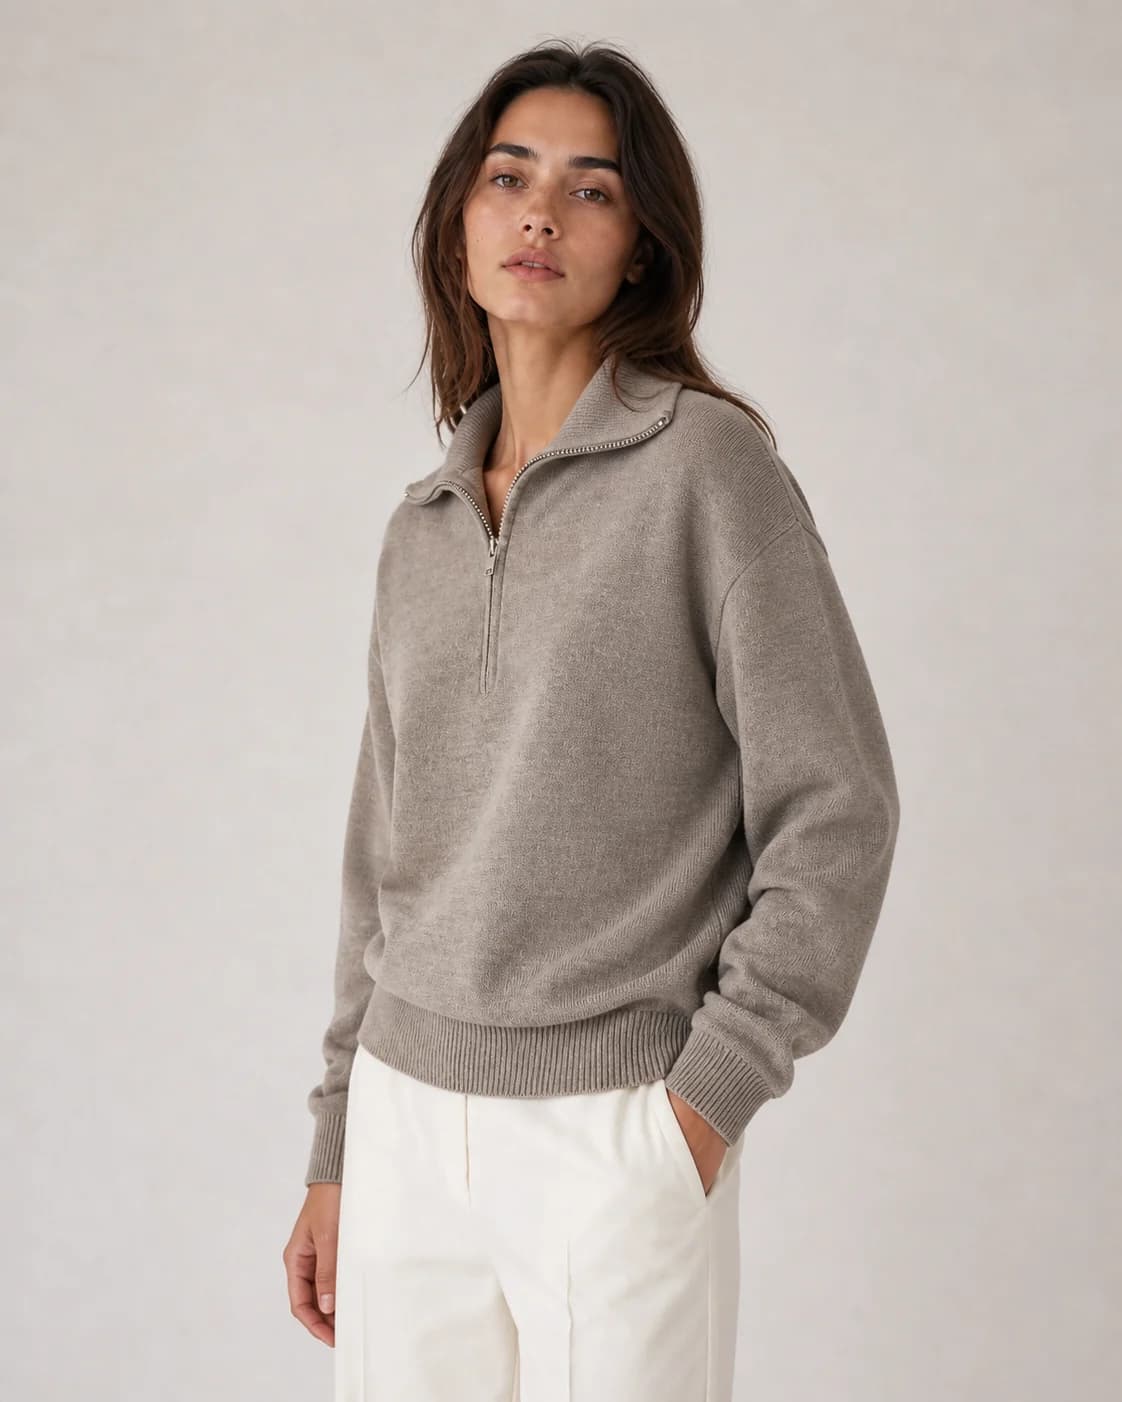
Use the supplied model photograph as the identity and outfit reference. Create one additional shot: {shot_description}. Keep the same adult model, face, hair, body proportions, grey half-zip pullover and trousers. Preserve the collar shape, zipper length, knit texture and garment color. Maintain the studio background and soft light direction. Change only the pose and framing needed for this shot. Keep hands anatomically plausible and avoid covering the main garment details. Do not add accessories or text. Output a single 3:4 portrait, not a collage.What to customizeTry a full-length relaxed stance first, then a waist-up view of the collar. Specify a side view only when reference material supports the unseen garment details.
What to checkCompare face, hair and zipper placement across the set. Reject frames that subtly change the garment length or create inconsistent sleeve cuffs.
Create an accessory try-on close-up
Show how an accessory sits on the body while keeping its design visible.
An earring close-up is primarily a scale and placement problem. Hair, lighting and head angle should make the attachment and outline legible rather than overwhelm the jewelry. If the physical dimensions are unknown, avoid presenting the generated image as a precise size comparison.
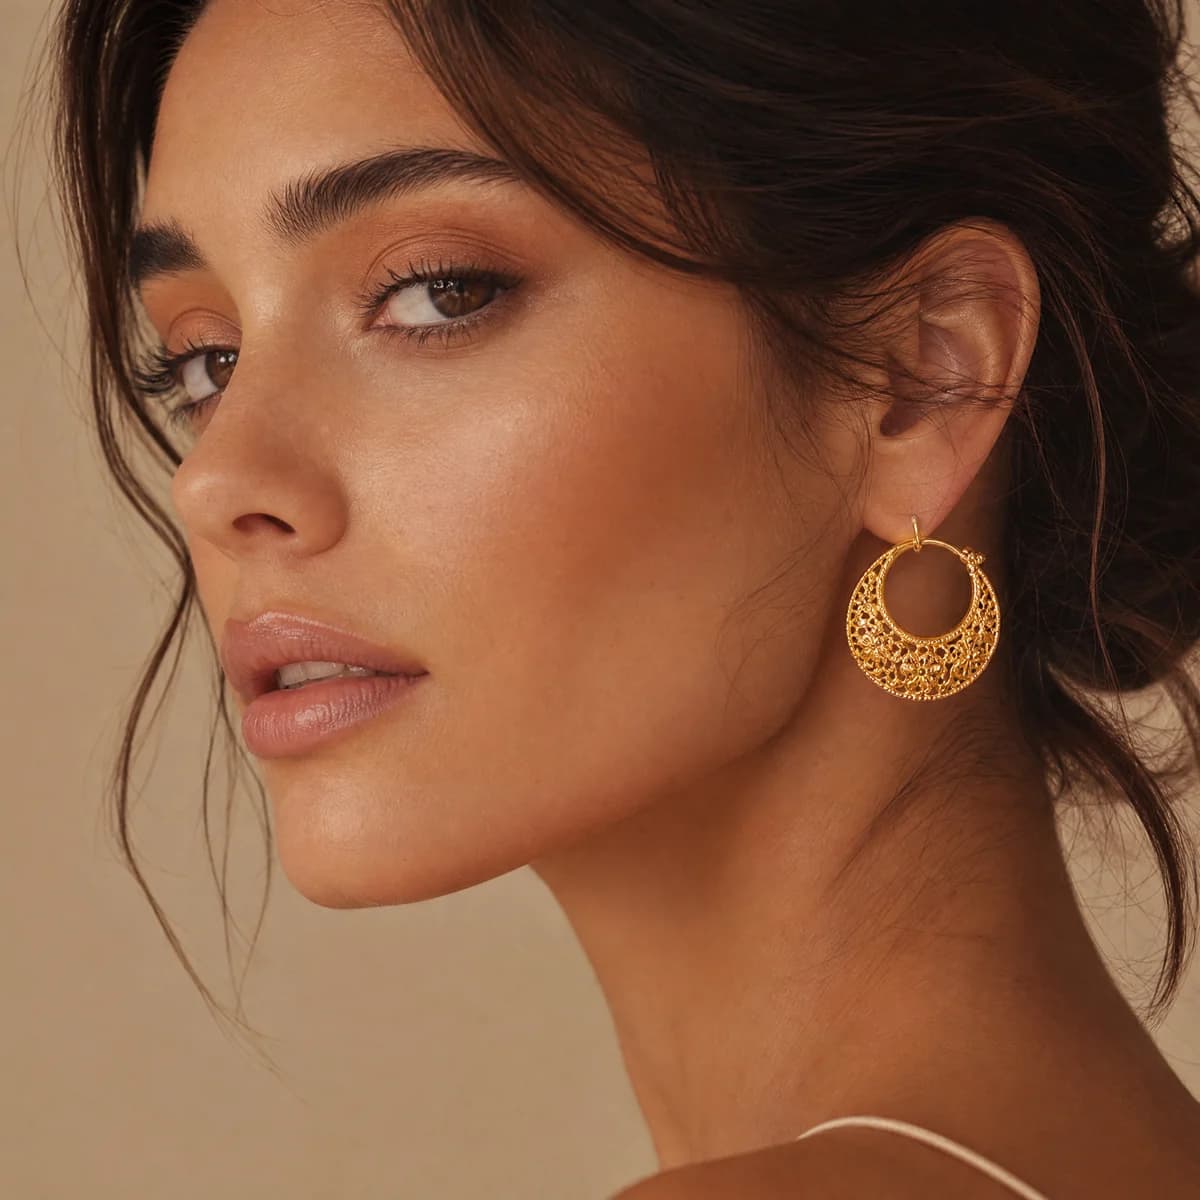
Show an adult model wearing the earring in the uploaded reference. Preserve the earring outline, openwork pattern, metal color and fastening design. Create a head-and-shoulders portrait with the visible ear unobstructed and hair tucked behind it. Use soft side lighting that reveals the metal without blowing out its details. Match the accessory size to {verified_dimensions}, if provided; otherwise keep the result illustrative rather than adding a measurement claim. Keep skin texture natural. Do not redesign the jewelry, add extra piercings or include text. Use a square composition.What to customizeAdd verified dimensions when scale matters. Specify which ear should face the camera and whether the fastening needs to be visible.
What to checkInspect the earlobe attachment, repeated holes or patterns, and the shape of reflections. The design should match the product, not just resemble a generic gold earring.
3. Product showcase and photography prompts
A showcase image should make the product easier to examine. Multi-angle views explain form; controlled variants compare finishes; setting changes suggest a use occasion. Keep these tasks separate so it is clear which details are fixed and which are deliberately changing.
Build a multi-angle footwear gallery
Give shoppers complementary views of a product’s construction.
The two selected examples expose the sole and the rear of the boots. They demonstrate why a shot list should name the feature to reveal, not merely ask for a different angle. For accurate commerce imagery, provide real reference photos of hidden surfaces; a model may otherwise invent tread, stitching or hardware.
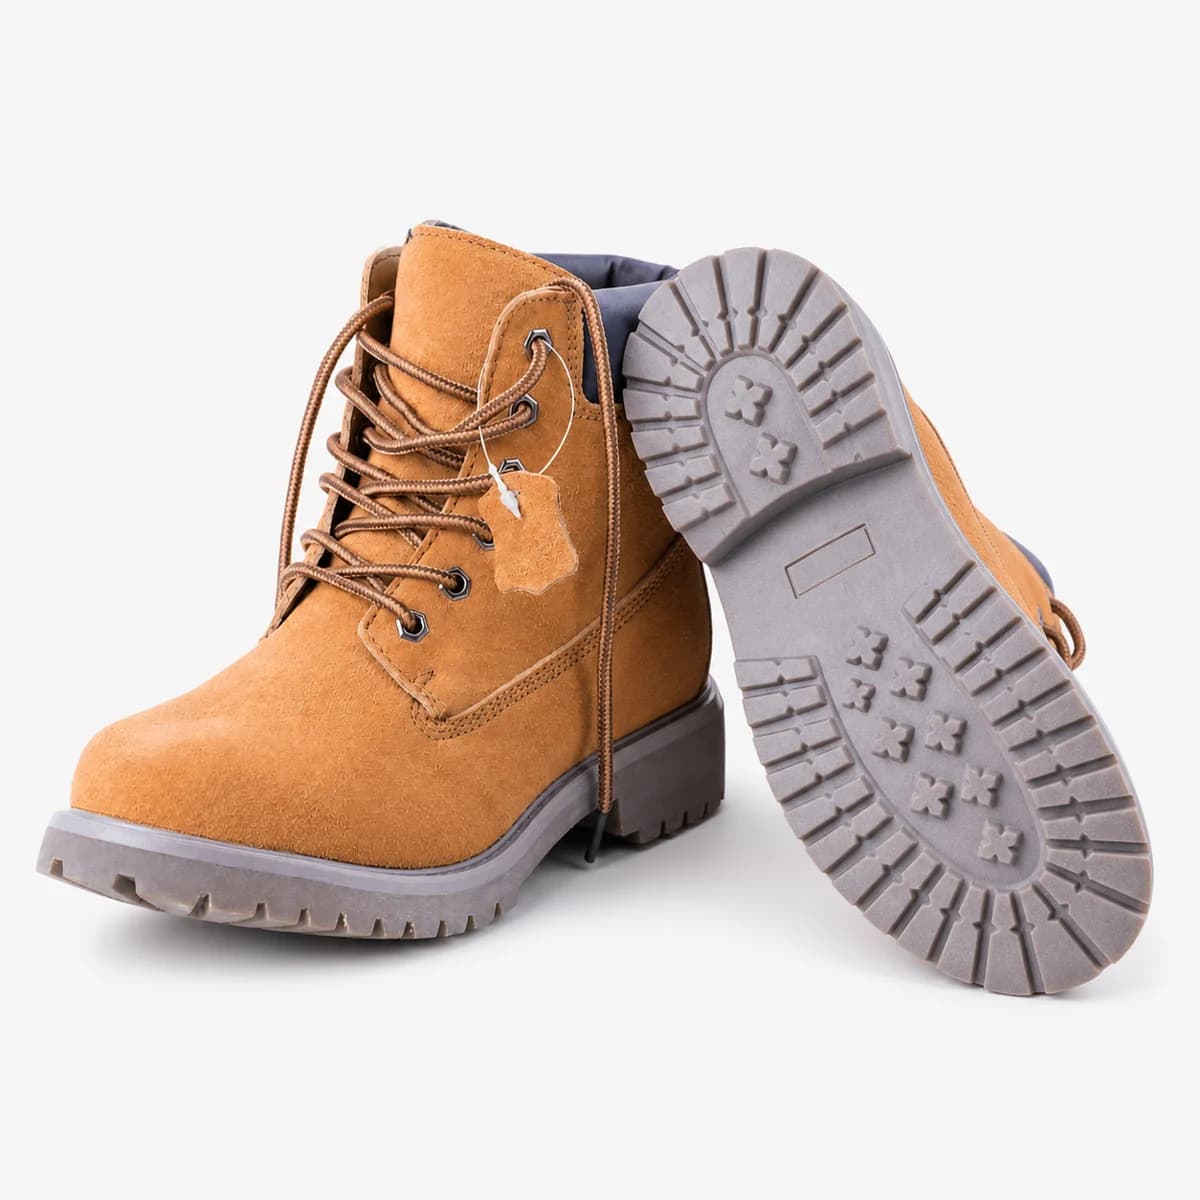
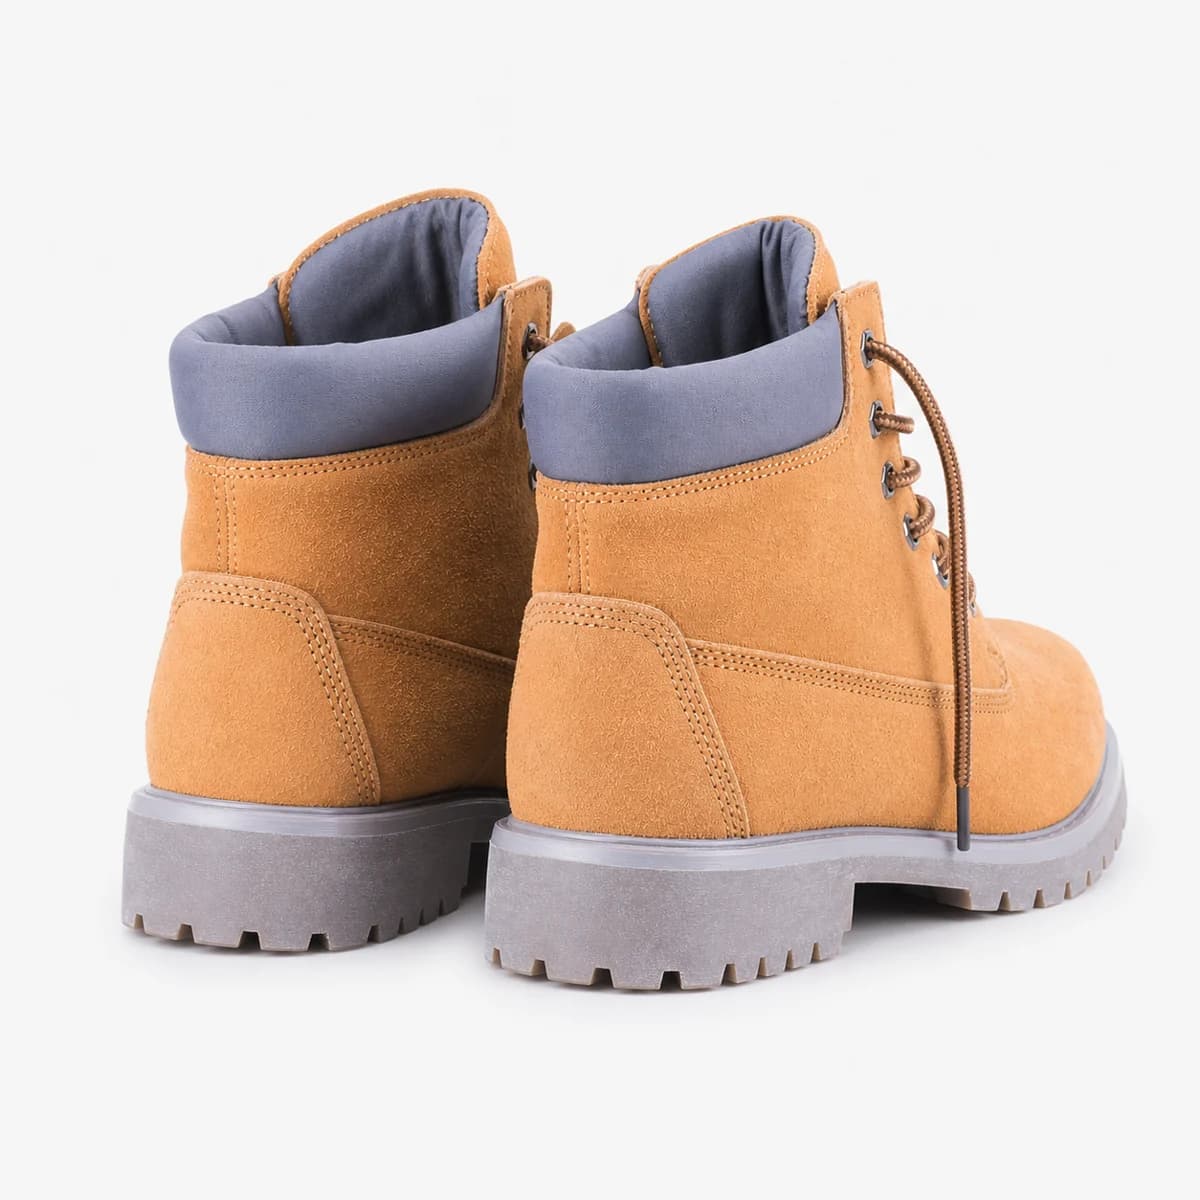
Create one clean catalog view of the hiking boots shown in the supplied product references. Required shot: {view_and_feature_to_reveal}. Preserve the boot shape, tan upper, collar padding, eyelets, laces, stitching and sole geometry. Use the supplied sole or rear reference wherever that surface is visible. Place the boots on a white background with soft contact shadows and consistent studio lighting. Do not infer an unseen tread pattern or add hardware. If the required surface is not shown in the references, keep the view within supported angles. No text. Use a square frame.What to customizeFor the sole image, request a composition that reveals the actual tread. For the rear image, keep the heel and collar unobstructed.
What to checkCompare sole grooves, eyelet counts and seam locations across all views. Use a real photograph when a generated view cannot preserve a technical detail.
Compare approved color and material variants
Explore a controlled change of finish while retaining a consistent composition.
The paired jacket images make the intended variation easy to isolate because the model and setting remain similar. Use this workflow for creative planning or for variants backed by real samples. Appearance alone cannot prove what a fabric is made from, so do not assign a fiber composition based on the generated texture.
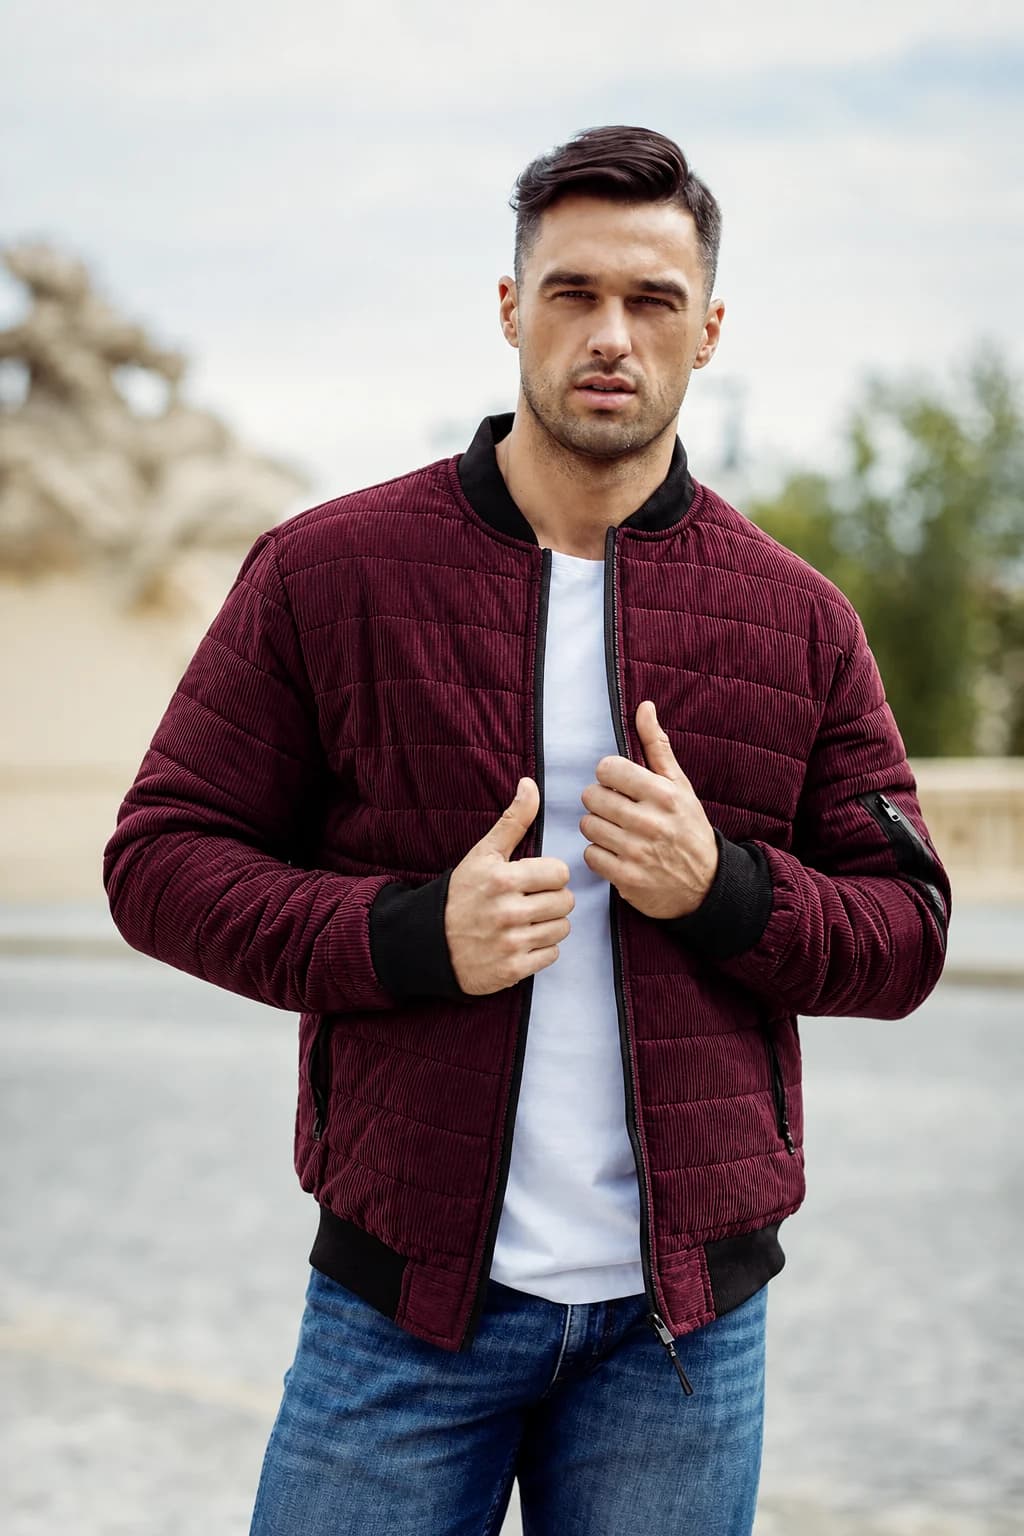
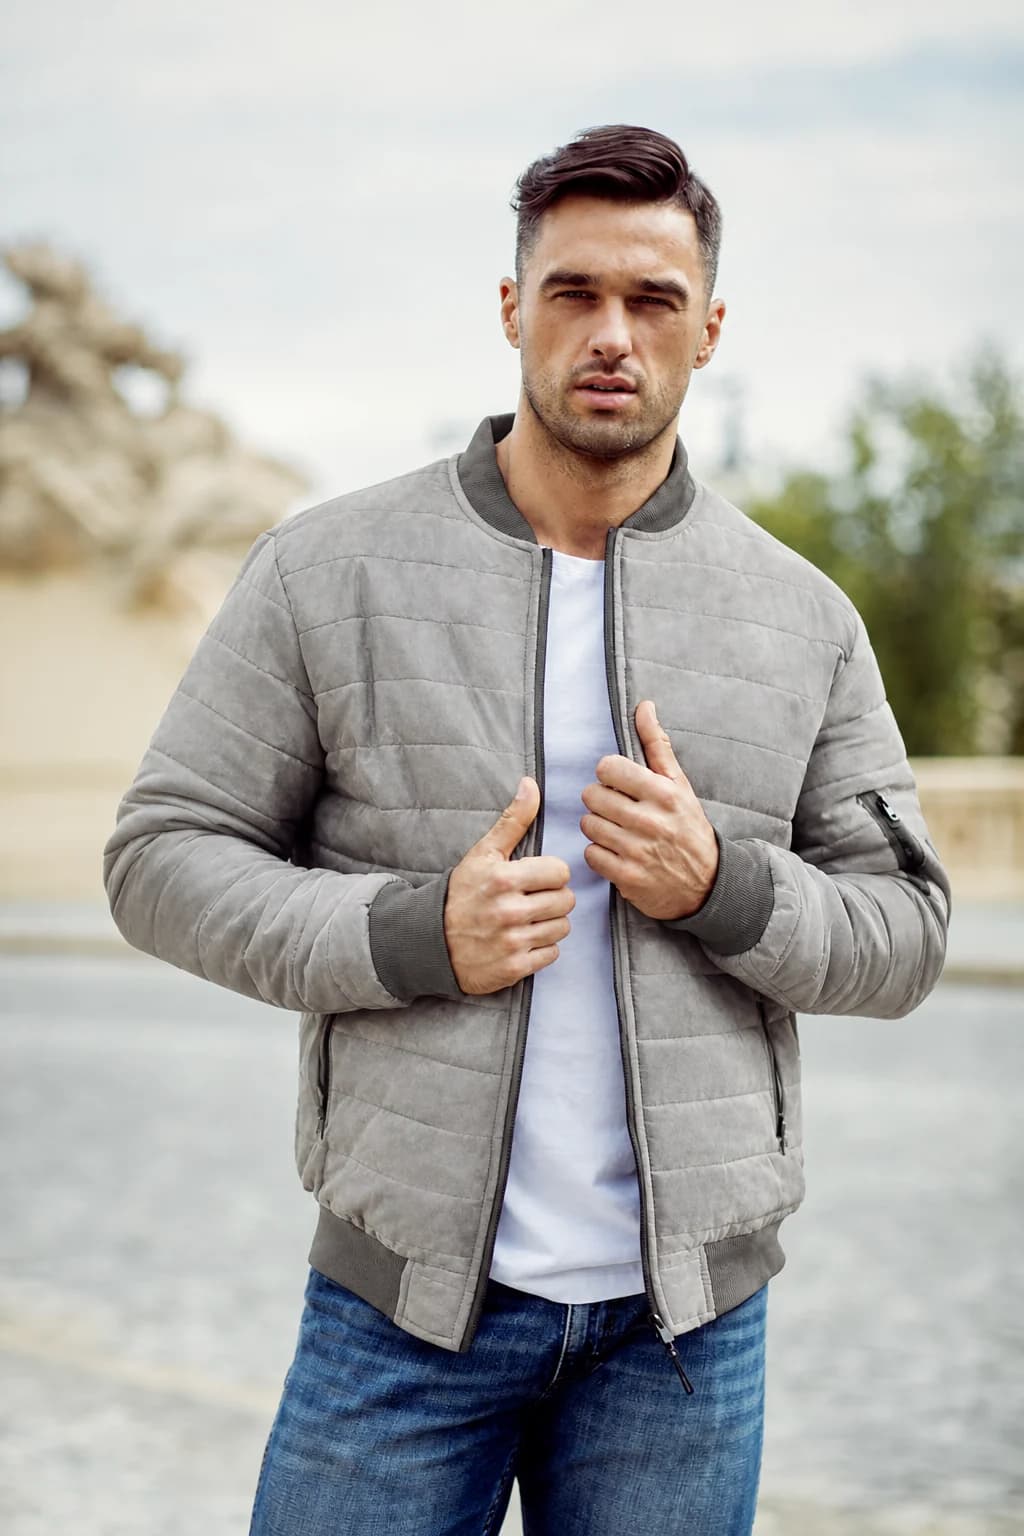
Edit the uploaded model photo to show the approved {color_name} version of the jacket, using {variant_reference} as the color and surface reference. Preserve the model, pose, jacket cut, quilting pattern, zipper, cuffs, trousers and background. Change only the jacket color and the surface finish explicitly shown in the variant reference. Keep shadows and folds consistent with the original light. Do not change the jacket construction or imply a different fabric composition. Add no text. Return one 3:4 portrait with the same crop as the reference.What to customizeMake one image per verified variant. When exploring an unproduced finish, label it as a concept rather than placing it in a live product gallery.
What to checkCheck color under neutral viewing conditions and compare it with the actual sample. Keep color names and material descriptions tied to supplier specifications.
Place a product in a relevant outdoor setting
Connect a product with a plausible use occasion without distracting from its shape.
The bottle beside a stream is a compact example of an environment doing useful work: it suggests an outdoor context while leaving the product readable. Keep the bottle large enough to inspect, with the stream providing context rather than becoming the subject. A rocky background alone does not demonstrate durability, waterproofing or thermal performance.
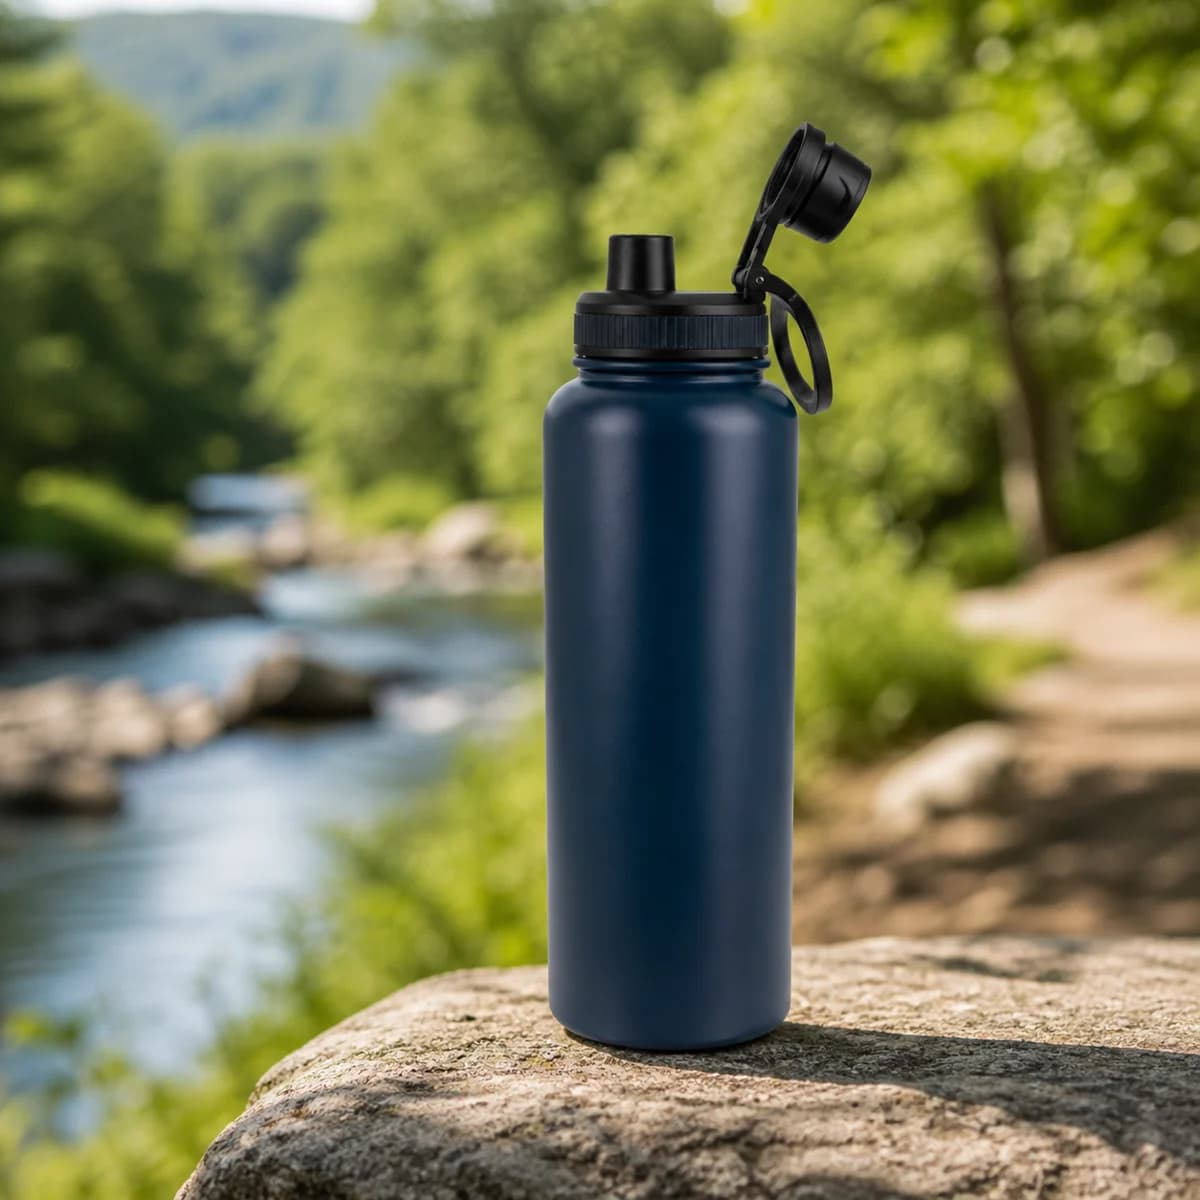
Use the uploaded bottle photograph as the exact product reference. Place the same bottle upright on a stable rock beside a softly blurred stream with green vegetation. Preserve its body shape, dark blue color, lid, drinking opening and carry loop. Use natural daylight with a grounded contact shadow and realistic surface reflections. Keep the bottle visually dominant and the background understated. Do not add splashes, performance badges, measurements or claims. Do not alter the bottle opening or introduce extra parts. Return one square lifestyle product image with no added text.
What to customizeSwap the setting for an actual use context, such as a desk or picnic table. Keep the support surface plausible for the product’s shape.
What to checkInspect the lid and carry loop against the reference. Make sure the base touches the rock and that the background does not imply an unverified product capability.
4. Human and product interaction prompts
People can clarify scale and use, but only when the interaction makes physical sense. State what the person is doing, where their hands go and which parts of the item must remain visible. Start with a simple action before attempting elaborate movements or multiple people.
Demonstrate a handheld cleaning product
Show an understandable use action with a believable grip and contact point.
This example includes the person instead of isolating the tool, making the cleaning action easier to interpret. The important details are practical: the handle should connect to the head, the head should meet the floor, and both hands should hold the same continuous object. Avoid adding exaggerated before-and-after effects to a basic demonstration.
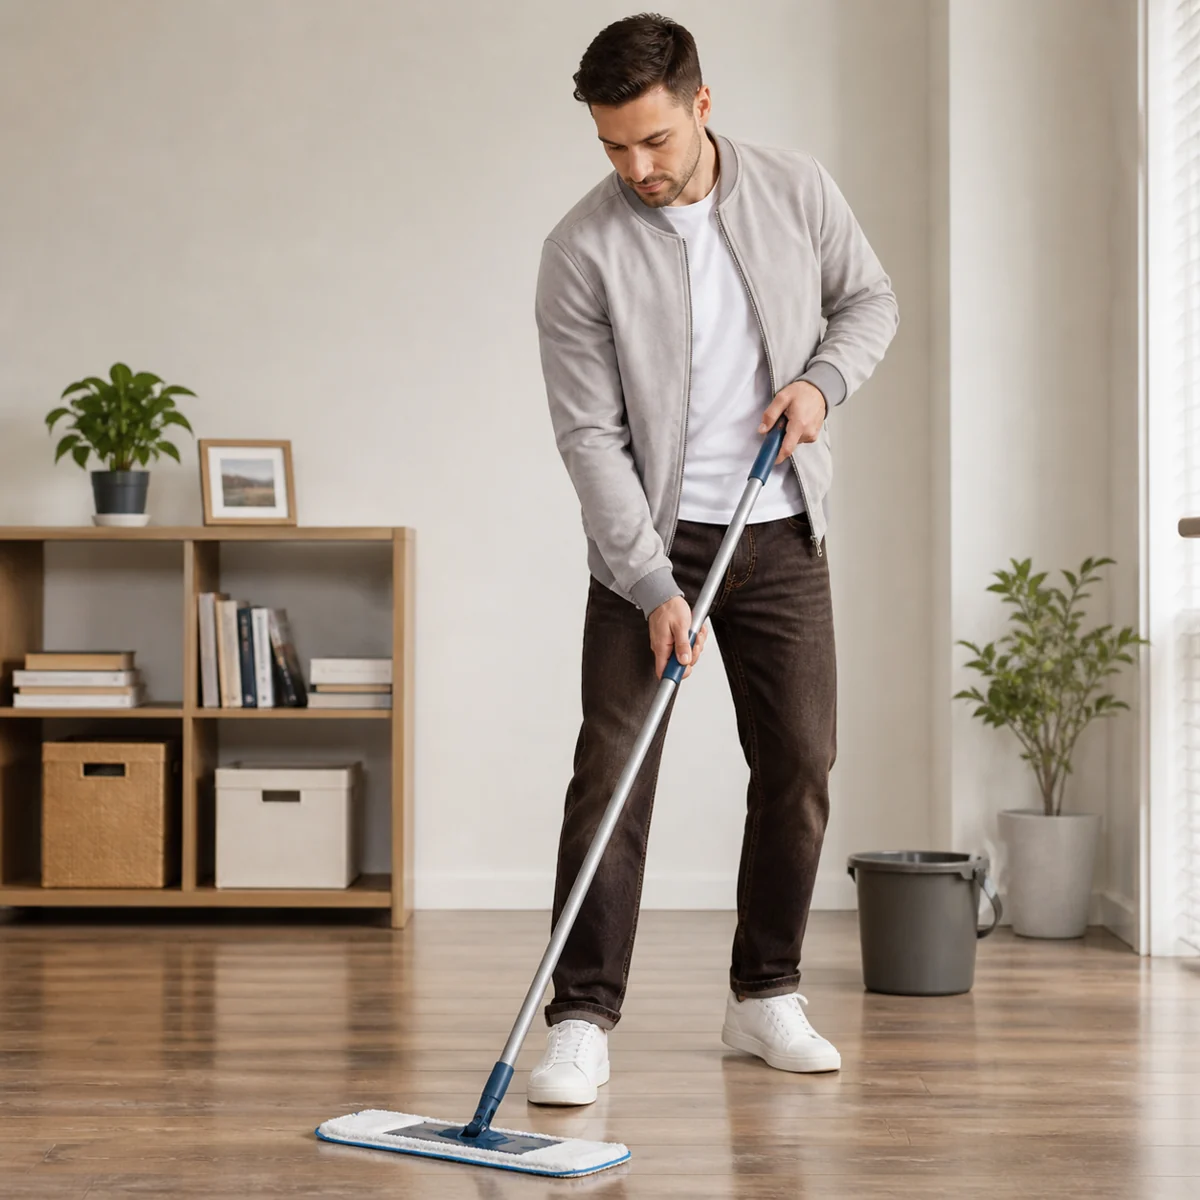
Create a realistic home-use image showing an adult naturally holding and using the mop from the uploaded product photo. Keep the mop head, handle, joints and colors unchanged. Position both hands in a believable grip on the same handle, with the mop head resting flat against a wooden floor. Show the person in a relaxed cleaning stance in a bright living room. Use natural daylight and realistic scale. Do not bend the handle unnaturally, duplicate the tool or add cleaning-performance claims. No text. Return a square lifestyle image.
What to customizeName the exact action and the required contact surface. For smaller handheld products, simplify the scene and move the camera closer.
What to checkTrace the handle from hands to head and inspect every contact point. Remove frames with disconnected parts, impossible grips or implausible floor reflections.
Show a person naturally wearing an electronic accessory
Make a product’s wearing position immediately understandable.
A headphone image works when the headband and ear cups fit naturally around the head. A simple portrait leaves fewer opportunities for product distortion than a busy action scene. Use facial expression and lighting to set the mood, but avoid treating a smile as evidence of sound quality or comfort.
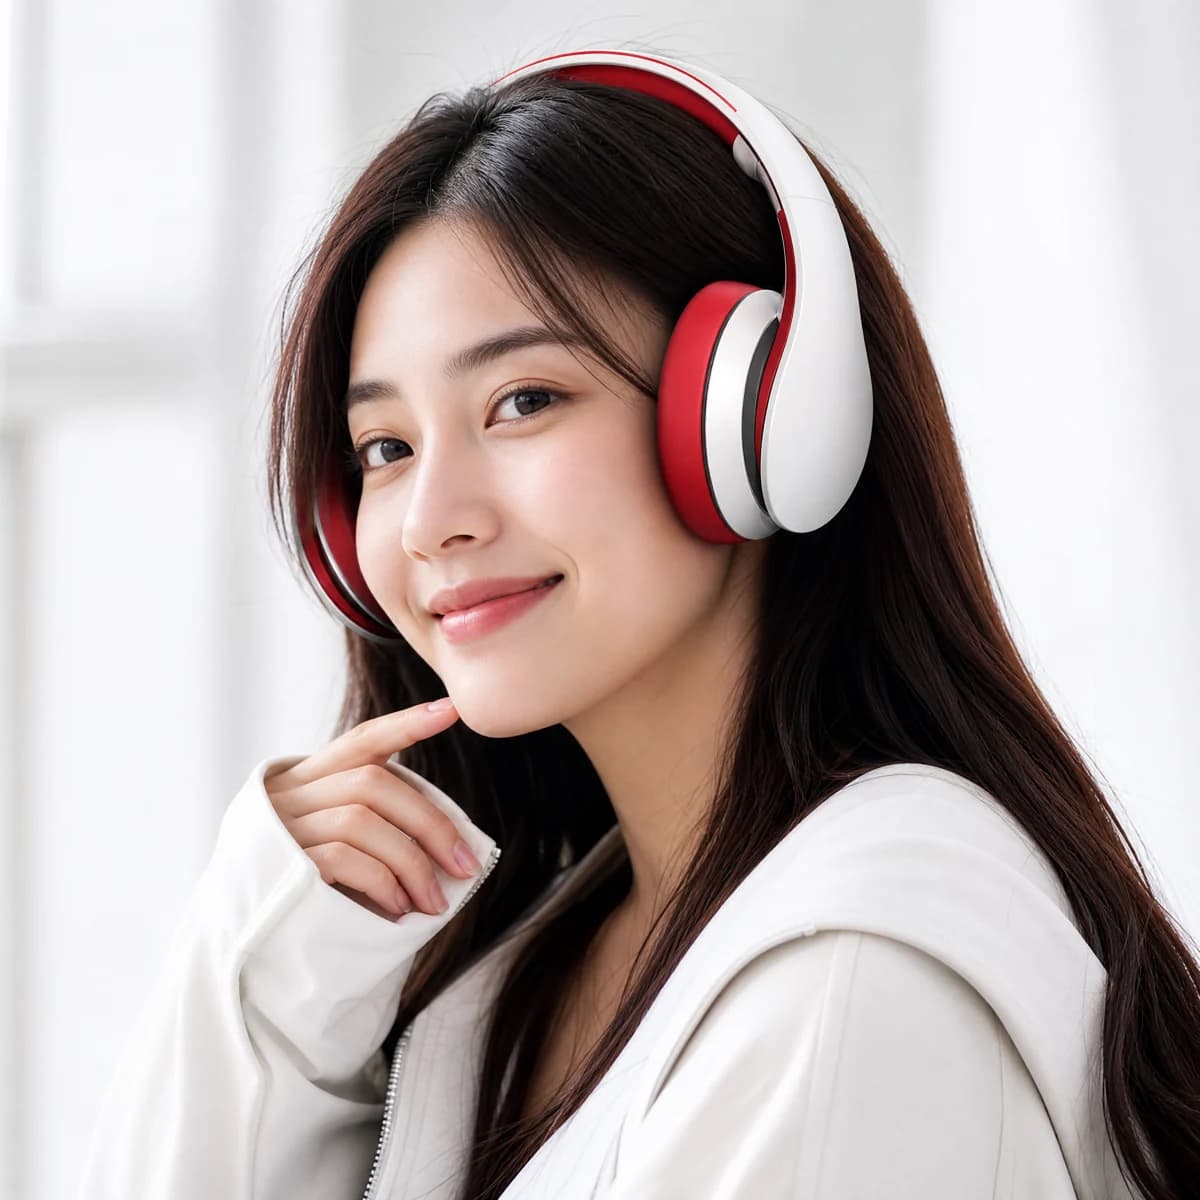
Create a natural portrait of an adult wearing the over-ear headphones from the product reference. Preserve the red and silver color arrangement, headband thickness, ear-cup shape and visible connections. Fit the ear cups realistically over the ears and the headband over the hair. Place the person beside a softly lit window with a calm, uncluttered background. Keep one ear cup clearly visible. Use realistic skin and material texture. Do not add cables, controls or product features absent from the reference. No captions or performance claims. Output one square image.
What to customizeSpecify the product-facing side and a simple head angle. Provide a second product view if the headband connection is hard to see.
What to checkInspect the headband continuity and cup placement. Check that hair does not merge with the product or hide a changed shape.
Add a reference person to a furniture scene
Keep a chosen person recognizable while showing how furniture is used.
A seated figure helps communicate a chair’s intended use, but the body must interact with the cushion and frame. Supply a reference of the person as well as the furniture scene. Be explicit about which image defines the room and which defines the person so the edit does not blend unrelated features.
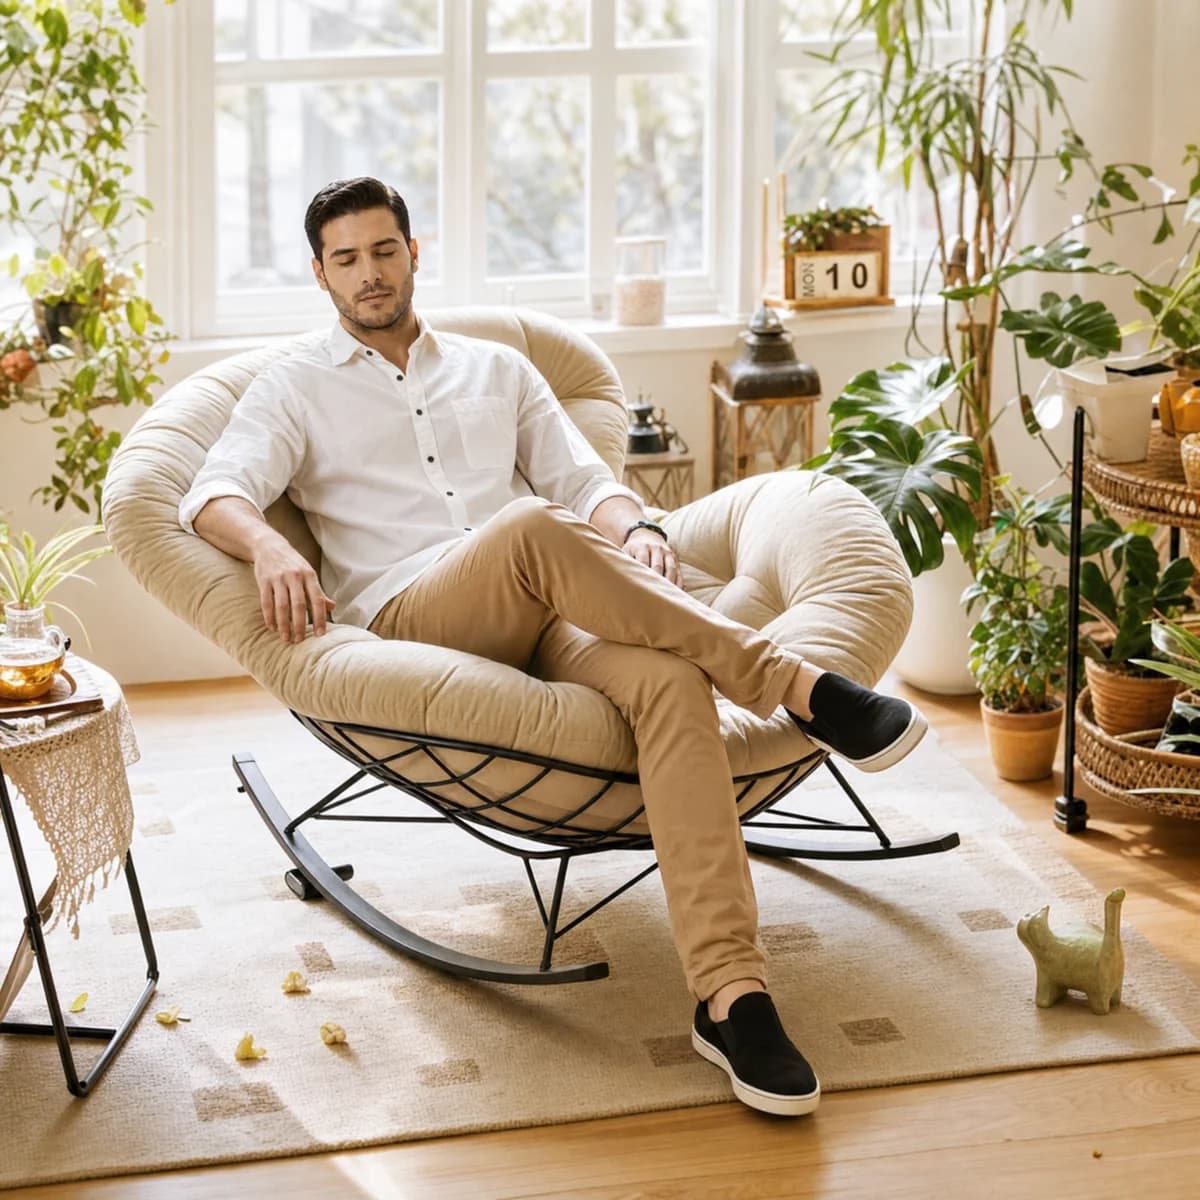
Image 1 is the furniture scene. Image 2 is the approved adult person reference. Add that person seated naturally in the chair from image 1, with a relaxed posture and {hand_and_leg_position}. Preserve the chair frame, cushion shape, room layout and window light. Keep the person recognizable from image 2. Match perspective, body scale, contact shadows and cushion compression to the seated pose. Do not redesign the furniture or change the room. Avoid crossed or merged limbs. Add no text. Return one square lifestyle photograph.What to customizeDescribe an easy seated pose first. Choose a person reference with a clear face and sufficient visible body detail.
What to checkInspect feet, armrests and seat contact. A convincing scene should not require changing the furniture’s dimensions to accommodate the person.
Review the image against the product, not the prompt
An image can follow the mood of a prompt and still show the wrong product. Use the original photograph and verified product information as the final reference. This is especially important for small details that make a SKU distinctive.
- Identity: Compare color, proportions, fasteners, openings, seams and packaging. Look for extra or missing components.
- Physical logic: Trace hands, handles, straps, seat contact and shadows. Check that objects connect and sit on their surfaces naturally.
- Text: Read every letter and number at full size, then preview the image at mobile size. Remove unsupported claims or accidental wording.
- Consistency: Review the full gallery together. A sole pattern, garment hem or furniture leg should not change between frames.
- Offer accuracy: Distinguish props from included accessories and styling concepts from available variants. Avoid turning atmosphere into a performance promise.
- Placement: Check the destination’s current image requirements and crop. Keep essential product details away from areas likely to be covered by interface elements.
If the result fails, write a focused correction: name the incorrect detail, describe the required replacement and identify everything that must stay unchanged. When a technical feature cannot be reproduced accurately, use a real product photograph for that view.
Frequently asked questions
How do I write a useful GPT Image 2.5 e-commerce prompt?
Start with the job of the image, then identify the product reference, details to preserve, allowed changes, setting, composition and exact approved text. A narrow brief is easier to evaluate than a long list of style adjectives. Use one of the case prompts above and replace every placeholder before generating.
Can I use one product photo for all 15 examples?
One clear product photo can support several scene and styling experiments. It cannot reliably describe hidden surfaces, exact fit or undocumented variants. Add real references for the back, sole, fastenings or alternate finishes whenever those details appear in the requested image.
How can I keep the product consistent across images?
Reuse the same reference images and explicitly name the fixed details: proportions, color, seams, openings, fasteners and packaging text. Change one variable at a time. Compare each result against the original instead of assuming a previous successful image guarantees the next one.
Should product images contain English text?
Use English when it matches the audience and the image benefits from a short label. A text-free lifestyle image can be equally useful. For an infographic, provide exact approved wording and check every character. Main-image text requirements depend on the destination and product category.
Are these images verified outputs from the rewritten prompts?
No. They are selected reference examples, retained to illustrate the type of visual each workflow addresses. The prompts have been rewritten and expanded for this guide, and they were not used to regenerate the displayed images. Results depend on the references, settings and edits you use.
Can I publish generated images directly in a product listing?
Review the product details, claims, packaging, scale and any people or text before publishing. Check the destination’s current image requirements. Use real product photographs wherever a generated view would invent construction, measurements or performance evidence.
Start with one product.
Build a coherent image set.
Choose the case closest to your next listing or campaign, prepare the product reference, and customize the prompt. Keep the first brief small enough to review carefully before creating the rest of the gallery.
GPT Image 2.5 Generator
5. Social commerce image prompts
Social images need a clear visual idea that survives a small screen. Fashion sequences benefit from recognizable styling, gifting images need honest presentation, and food scenes should make the product itself appetizing. Keep image text brief and move longer explanations into the accompanying post.
Create a cohesive fashion studio sales set
Build a small series with a consistent model, outfit and visual setting.
The two selected frames show a straightforward presentation and a gentle skirt movement. They offer useful variation without changing the entire scene. Plan a sequence around what the buyer needs to see: overall silhouette first, a fabric or construction detail second, and one natural movement frame where appropriate.
Create one image in a coordinated fashion sales series using the uploaded dress and approved model reference. Shot for this image: {shot_description}. Keep the same adult model, pink floral dress, print scale, neckline and hem. Use a bright studio with a mirror and a simple clothing rack, soft window light and consistent color grading. Keep the outfit dominant and props secondary. For a movement shot, use a gentle, believable gesture that shows the skirt without changing its length or volume. No text or extra garments. Output one 3:4 portrait, not a grid.What to customizeGenerate each planned shot separately with the same references. Keep the model, light and background instructions identical between shots.
What to checkCompare neckline, print and hem across the series. Check mirror reflections and avoid showing extra limbs or contradictory outfits in the reflection.
Style apparel as a gift
Present a gifting idea while keeping the garment’s defining design visible.
A folded shirt can lose the very feature that makes it recognizable. Arrange the fold around the print or construction detail rather than hiding it. Packaging also changes what shoppers may expect to receive, so an image of a decorative box needs supporting copy if that box is not part of the purchase.
What to customizeChoose packaging consistent with the actual offer. If the box is only a styling prop, say so in the product or post caption.
What to checkVerify that the garment pattern has not shifted or become a new design. Separate gifting inspiration from a claim about included packaging.
Build a fresh-food market scene
Create a clear, appetizing food image with a recognizable selling context.
The grape crate communicates a market setting without a dense promotional layout. The reference includes English wording; reuse the composition only when its factual label matches the product. Variety, seed status and origin should come from verified product information, not from the visual appearance of the fruit.
Create one realistic market-style image of {verified_fruit_name} using the uploaded product reference. Preserve the fruit color, shape and natural surface texture. Arrange it in a wooden produce crate with a softly blurred market background and gentle daylight. Keep the fruit dominant. If a small sign is included, use only this exact verified English wording: "{approved_product_label}". Do not invent an origin, organic status, seed status, price or freshness guarantee. Avoid excessive shine and duplicated fruit patterns. Use a square composition suitable for a social post.What to customizeReplace the label with the exact variety information you can support, or omit the sign entirely. Use a simple background that does not compete with the fruit.
What to checkRead the sign at mobile size and compare it with the product information. Inspect repeated fruit shapes, unnatural stems and overly glossy surfaces.